(Godot) Voxel Terrain II
This week flew-by fast! I started the week with a short play-test with my husband. It is a unique feeling to show off this project to my family. The cooperative module worked great and we were in a multiplayer session within the first minute. Our first play-test was short, but I wrote down all his feedback: the showstopper bugs, the small annoyances and the feature requests! I spent about half my week addressing these issues.
Creative Module
I’ve done a few iterations, this week, on the ability for the users to modify their world. My goal was to be able to build a cubic house, during one session, by the end of the week. I’ve asked myself: what information does the user need to trust that clicking on a block will give what he wants? Are there pain-points when trying to lay down a pile of blocks?
Terrain Block
To improve the terrain generation algorithm, I’ve added more terrain block shapes, this week. In this screenshot, you can see the four block shapes that the terrain engine now supports:
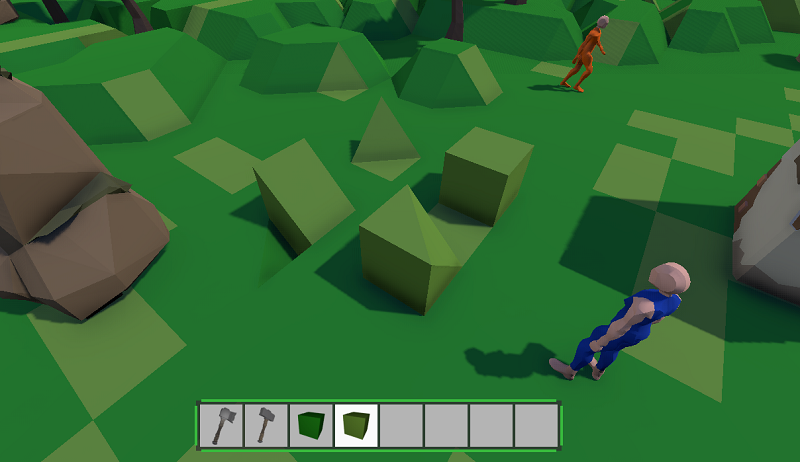
One interesting fact about these shapes is that they represent equal splits of the cube. The small pyramid in the top corner is exactly 25% of a cube. The slanted triangular prism in the right corner is exactly 50% of a cube. The large truncated pyramid in the bottom corner is exactly 75% of a cube. This gives an interesting progression curve that I leverage when the user wants to build something. Instead of asking the user to choose the shape to build, I ask him to click multiple times, each time adding more volume to the same voxel. I hope this provides the user with an interesting creative experience!
Ray-Casting
I’ve introduced ray-casting through the voxel terrain structure, a couple of weeks ago. At first, I was simply ray-casting downwards from the sky to find the first ground cell. This was useful when placing trees, rocks and rabbits in the terrain generation algorithm. When I worked on physical movements for the player character, I introduced a free-form ray-casting function. I’ve expanded its use quite a bit through the past couple of weeks: physical movements for the AI agents, camera placement for the player, clicking to place or remove terrain blocks.
My first implementation of the free-form ray-casting function simply used an iterative method. This implies dividing the ray into 1000 positions, then checking each one to see if it is within a solid object or the void. I’ve since upgraded the function to use Godot’s internal ray-intersection methods. I’m currently using Godot’s TriangleMesh class with success. I’ve added abstract structures to the terrain engine so that I can easily get a TriangleMesh object for any voxel, regardless of the shape of the block it holds. During the ray-cast, when the ray enters a voxel, I use the TriangleMesh object of a cube to detect where the ray will exit the voxel. I also use the TriangleMesh object for the block shape of the voxel, to see if the ray hits it. This keeps the code clean, generates fewer iterations, but my analysis shows that I will need to optimize its performance.
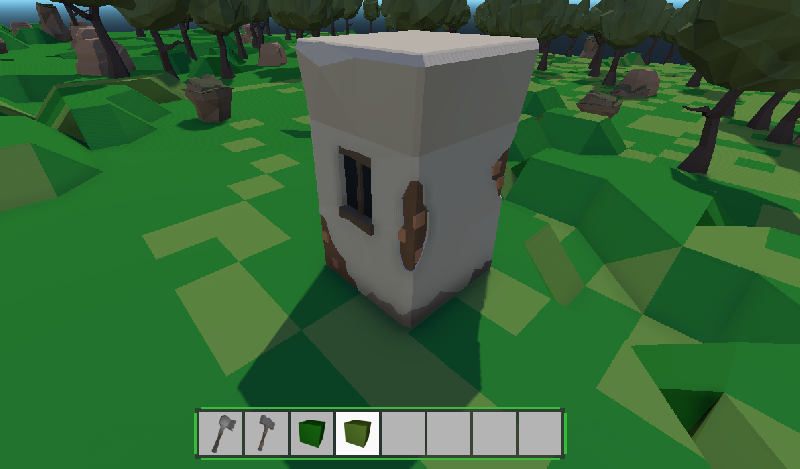
Large Object Support
In order to use the ray-casting algorithm, described above, with the camera controls, I’ve tackled the problem of large objects. Instead of pretending that all objects fit within one voxel in the terrain engine, how can I change my algorithms to support custom dimensions for each object? Today, I’ve set the dimensions of my large objects to be the smallest axis-aligned bounding box that fits them. Supporting multiple objects within a voxel is definitely something that I want to work on, later…
This screenshot shows the hut as a 8m^3 object (2m x 4m x 2m):
User Interface
This will be my focus for the next week. Right now, the player has an infinite supply of materials to build. This certainly goes against the laws of physics, but also doesn’t make for a great game. As a very technical individual: the user interface isn’t where I want my project to innovate. Rather, I want my user interface to feel familar to the users. For this purpose, I’ve introduced a bottom quickbar. More on this, next week!